Installing Tomcat
How to install on Windows
-
Download the Tomcat 10 package for your platform type.
For Windows users, follow the instructions in the setup wizard. You will need the location of your Java installation.
-
Start Tomcat
-
Mac Users: Following the instructions MAC install instructions for Tomcat for starting Tomcat from the command line.
-
Windows Users: Inside your tomcat installation, in the 'bin' folder, there is a file, tomcat9w.exe. This application acts a user interface for Tomcats. Allowing you to start/stop the process as well as altering variables like memory and logging locations.
-
-
You can verify Tomcat has started by checking the url localhost:8080 (or whatever port you set). You should see a tomcat landing page.
-
SHUTDOWN Tomcat for the 3Sixty installation.
Note:
Set the JVM_opts MIN and MAX memory options. Setting your MAX to be as much as possible. -Xmx3072m -Xms1024
Tip: Shared Loader (Optional)
A shared loader allows you to keep your simflofy-global.properties and mongo_db.properties from being overwritten when installing a new 3Sixty war file. When 3Sixty starts, the properties in the shared loader folder will take precedence over the ones in 3sixty-admin/WEB-INF/classes.
To set it up:
1. Open tomcat/conf/catalina.properties.
2. Add "${catalina.base}/shared/classes" to shared.loader.
3. If the folder tomcat/shared/classes folder does not exist, create it.
4. Put your simflofy-global.properties or mongo_db.properties file in the new folder.
How to install on Mac
Important: You need to have Java JDK installed on your system in order to install Tomcat.
-
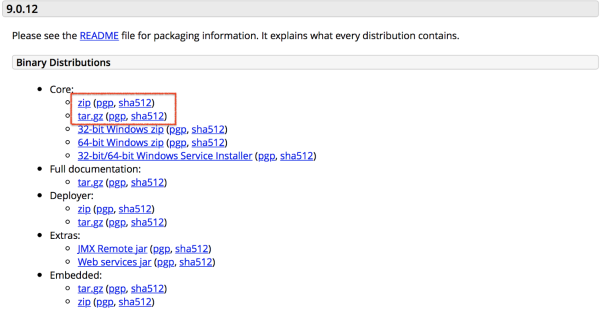
Download Tomcat zip or tar file from the Apache Tomcat site. For example:
-
Make the .sh files executable:
-
From your terminal, navigate to the tomcat bin folder:
cd apche-tomcat-9.0.12
cd bin/ -
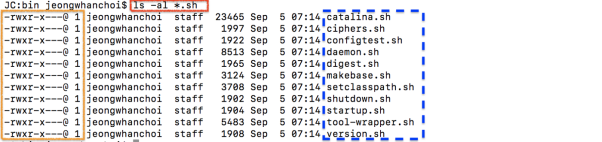
Filter to list all .sh files:
ls -al *.sh
-
Change permissions to make the files executable:
The .sh files do not have executable permissions. Change the permissions of these files:
chmod +x *.sh
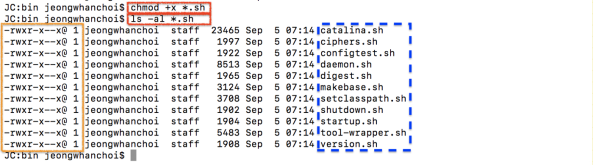
*Now, you can see there is an x flag added to these files.
-
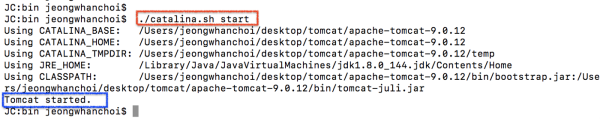
Start the Tomcat by startup.sh.
Our purpose, there are two files which are important one is this startup.sh to start the Tomcat and other is the shutdown.sh to shut down the Tomcat server. So, first, you are going to just execute the startup.sh message file, so you just need to just give this come on dot forward slash so just give dot forward and, then startup.sh and this will execute this start-up shell script. You can see the last message here, Tomcat started.

Now how to check whether Tomcat that is properly started or not. Go to the browser and enter localhost:8080. The port 8080 is the default port for the Tomcat to start.
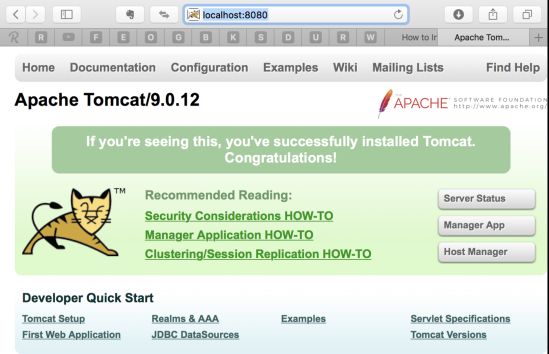
*You will be able to see this kind of interface and that means your Apache server is running fine.
Stop the server
Now to stop your server you just need to run the stop script, so you just need to write shutdown.sh.

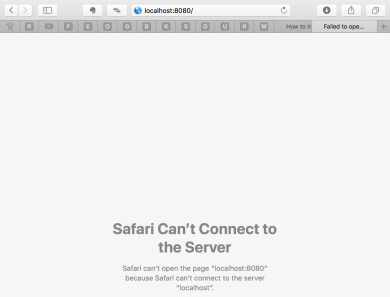
Once you run this and refresh the localhost:8080 page, now nothing is shown here, so our Apache Tomcat server is stopped.
Start the Tomcat
./catalina.sh start
./catalina.sh stop
Move to Library Folder
sudo mv Tomcat/ /Library/
cd /Library/
cd Tomcat /bin/
You have now successfully installed Apache Tomcat on your MAC!
Overview
The full documentation for Tomcat 8 is here: Tomcat SSL How To
Below we summarise the steps you'll need to take.
Certificate
First, you need to generate a certificate or install a certificate.
-
Create a local self-signed Certificate (as described in the previous section):
keytool -genkey -alias tomcat -keyalg RSA -keystore (your_keystore_filename)Note: In some cases, you will have to enter the domain of your website (i.e.www.myside.org) in the field "first- and lastname" in order to create a working Certificate.
-
The CSR is then created with:
keytool -certreq -keyalg RSA -alias tomcat -file certreq.csr -keystore (your_keystore_filename)Enable SSL and Port
Next, enable SSL and Port 8443 or port 443 in tomcat/conf/server.xml
-
Find a section in server.xml that looks like this:
Copy<!--
<Connector port="8443" protocol="org.apache.coyote.http11.Http11NioProtocol"
maxThreads="150" SSLEnabled="true">
<SSLHostConfig>
<Certificate certificateKeystoreFile="conf/dos1235.jks" type="RSA" />
</SSLHostConfig>
</Connector>
--> -
Uncomment it out by removing the <!- and --> at the end to get
Copy<Connector port="8443" protocol="org.apache.coyote.http11.Http11Protocol"
maxThreads="150" SSLEnabled="true" scheme="https" secure="true"
clientAuth="false" sslProtocol="TLS" /> -
To enable client authentication, you need to reference your SSL certificate based on your version of Tomcat. You can modify the above to look like this:
Tomcat 8:
Copy<Connector port="8443" protocol="org.apache.coyote.http11.Http11Protocol" SSLEnabled="true"
maxThreads="150" scheme="https" secure="true"
keystoreFile="${catalina.base}/external-conf/.keystore" keystorePass="PUT_YOUR_KEY_PASS_HERE"
clientAuth="false" sslProtocol="TLS"
sslEnabledProtocols="TLSv1.2,TLSv1.1,TSLv1.2"/>For keystorePass, replace PUT_YOUR_KEY_PASS_HERE with the password for your key.
Tomcat 9:
Copy<Connector
protocol="org.apache.coyote.http11.Http11NioProtocol"
port="8443" maxThreads="200"
scheme="https" secure="true" SSLEnabled="true"
keystoreFile="${user.home}/.keystore" keystorePass="PUT_YOUR_KEY_PASS_HERE"
clientAuth="false" sslProtocol="TLS"/>For keystorePass, replace PUT_YOUR_KEY_PASS_HERE with the password for your key.
Tomcat 10
Copy<Connector
protocol="org.apache.coyote.http11.Http11NioProtocol"
port="8443"
maxThreads="150"
SSLEnabled="true">
<UpgradeProtocol className="org.apache.coyote.http2.Http2Protocol" />
<SSLHostConfig>
<Certificate
certificateKeystoreFile="${catalina.base}/conf/dos1234-test.jks"
certificateKeystorePassword="objective"
type="RSA"
/>
</SSLHostConfig>
</Connector>For keystorePass, replace PUT_YOUR_KEY_PASS_HERE with the password for your key.
-
To disable http, comment out the following section:
Copy<Connector port="8080" protocol="HTTP/1.1"
connectionTimeout="20000"
redirectPort="6443" />Note, it may look slightly different in your install, but the important part is you will have a Connector tag that is uncommented, and you'll need to use xml commenting to disable:
Copy<!-
<Connector port="8080" protocol="HTTP/1.1"
   connectionTimeout="20000"
   redirectPort="6443" />
-->