SharePoint REST
Note: UPLOAD SIZE LIMIT
The SharePoint REST API has a hard 2 GB limit on uploads. There is currently no way to circumvent this limit.
Which SharePoint Connector Should I Use?
The connector you use depends on whether your SharePoint environment is hosted on-premises or in the cloud.
|
Environment |
Integration Connector |
Recommended Authentication |
|---|---|---|
|
SharePoint Online (Cloud) |
Microsoft Graph SharePoint Connector |
Microsoft Graph OAuth Connector |
|
SharePoint On-Premises |
SharePoint REST Connector |
SharePoint REST Azure AD OAuth Connector |
SharePoint Online (Cloud)
Use the Microsoft Graph SharePoint Connector. Microsoft Graph is the recommended connector for all SharePoint Online environments. OAuth is the preferred authentication method where possible.
Caution: It is recommended that MS Graph be used to Authenticate Microsoft Office products like SharePoint. If users are encountering job fails you should check your SharePoint permissions as the authorised account may not be limiting what 3Sixty can do.
SharePoint On-Premises
Use the SharePoint REST Connector. OAuth is recommended where possible. Note that the SharePoint REST connector is maintained primarily for legacy and on-premises environments — if you are not on-premises, use Microsoft Graph instead.
Authentication Connection
This connector require an Authentication Connection to function. Authentication connectors are used to authenticate repository/output connections that need certain authentication fields like access tokens or refresh tokens.
-
Select Authentication from the navigation menu or the dashboard.
-
Click the New Authentication button
-
Enter a unique name for the connection and give it a description
-
Select the connection type from the drop-down and click save.
-
Fill in the configuration settings on the edit connection page and click save.
Authentication Connections Overview
Important: Basic Authentication will no longer be supported starting April 2026 inline with Microsoft recommendations and changes.
Note: NTLM Authentication - For on premise instances using NTLM, include the full URL, including the subsite you wish to read from (/sites/XXXX). An authentication connection will be required for each site. The username should also include the domain prefix (domain\username)
SharePoint REST
The basic authentication method for SharePoint. The user needs to supply their username and password.
The server url: ie https://[tenant].sharepoint.com. IP Address and port will also work. If the instance is secured with an ADFS server, simply click the checkbox at the bottom.
Key Records Management Functionalities will not work with this authentication method. For RM, use OAuth
The basic authentication method for SharePoint.
SharePoint REST Authentication Connection Configuration
|
Field |
Description |
|---|---|
|
User Name |
The username to authenticate with the SharePoint server |
|
Password |
The password to authenticate with the SharePoint server |
|
SharePoint Online Server |
ie https://[tenant].sharepoint.com. IP Address and port will also work |
|
Login Using ADFS Server |
If your SharePoint instance is secured with an ADFS server, click this checkbox. |
SharePoint OAuth
Using the Microsoft Azure Authentication you will need to set up an app in 3Sixty by following the steps below.
Allowing Custom Apps in SharePoint
Note: CUSTOM APP AUTHENTICATION
This step is only required if you created your O365 tenant after the year 2019. Microsoft disabled custom apps by default, so there is a series of steps needed to turn them on and allow authentication using tokens. This will require the user of Microsoft PowerShell.
-
Install-Module -Name Microsoft.Online.SharePoint.PowerShell
-
$adminUPN="<the full email address of a SharePoint administrator account, example: jdoe@contosotoycompany.onmicrosoft.com>"
-
$orgName="<name of your Office 365 organization, example: contosotoycompany>"
-
$userCredential = Get-Credential -UserName $adminUPN -Message "Type the password."
-
Connect-SPOService -Url https://$orgName-admin.sharepoint.com -Credential $userCredential
-
set-spotenant -DisableCustomAppAuthentication $false
Creating an APP in SharePoint
|
Step |
Example |
|---|---|
|
Go to https://**tenant**.sharepoint.com/_layouts/15/appregnew.aspx where **tenant** is your organization. TENANT PERMISSIONS |
|
|
Fill in the App registration form
Click Create |
|
|
Make note of your Client ID and Client Secret that are displayed in the next screen once the app identifier has been created. |
|


Retrieve Entra ID
|
Step |
Example |
|---|---|
|
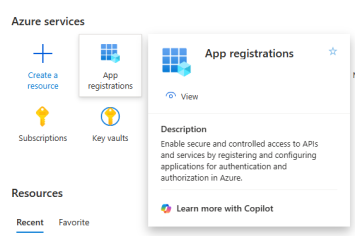
Go to portal.azure.com Select App registrations |
|
|
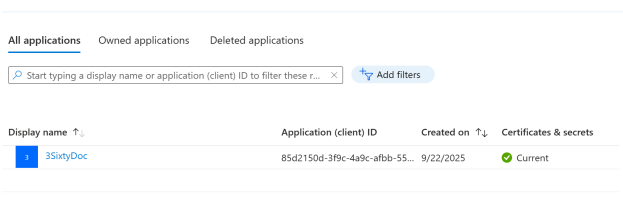
Click on your new application |
|
|
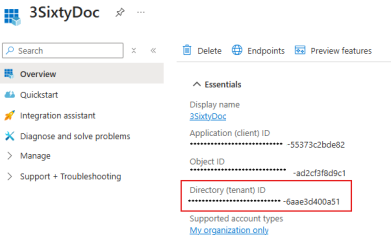
Retrieve Directory (tenant) ID |
|
Setting App Permissions
You may still need to set further permissions for your app in order for it to read/write content.
|
Step |
Example |
|---|---|
|
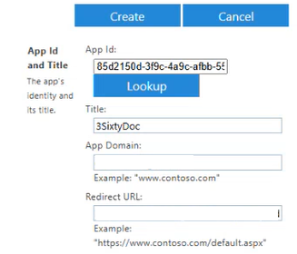
Go to https://**your tenant name**.sharepoint.com/_layouts/15/appinv.aspx Set App ID to your apps Client ID and hit "Lookup". The form should populate with your information. |
|
|
Note: TENANT PERMISSIONS |
|
|
Add app permissions
|
|
|
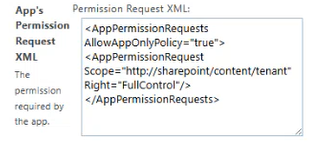
Once you have decided on your Scope and Right, input the request into the Permissions Request XML box and click Create. |
|
|
Tip: All permission requests take the form: Important: This request cannot contain formatting of any kind or the permissions will not be set Caution: Tenant sites, ones not linked directly to the team page, so /sites/Test, will require you to perform this process for them as well. In this case, using the SiteCollection scope. |
|
|
Select Trust It
|
|


SharePoint REST Azure AD OAuth Connection Configuration
|
Field |
Description |
|---|---|
|
SharePoint Online Service URL |
Full URL to connect to your SharePoint Online Service. The tenant url is required: ie tenant.sharepoint.com. |
|
Azure Active Directory ID |
Found at portal.azure.com -> azure active directory -> Properties (id) |
|
Access Scope (Optional) |
Scope is a mechanism in OAuth 2.0 to limit an application's access to a user's account |
|
Tenant Site Path |
Due to how 3Sixty performs connection checks, this field is required if your connection is only registered to a single tenant site. Otherwise, the check will give a false negative. |
|
Token Refresh |
Allows the user to set how often the authentication token will be refreshed. For larger runs where transactions may take longer, this will prevent authentication from expiring while transactions are still in progress. |
|
Client ID |
Provided to you during your App registration |
|
Client Secret |
Provided to you during your App registration |
|
Access Token |
Click Authenticate before saving to populate the Access token |
|
Expires |
The date the token expires |
Proxy Information
This tab is for if you're connecting through a proxy, and is optional.
|
Field |
Description |
|---|---|
|
ProxyURL |
The URL of the proxy server |
|
ProxyPort |
The port of the proxy server |
|
ProxyUsername (Optional) |
The username to authenticate to the proxy server |
|
ProxyPassword (Optional) |
The password to authenticate to the proxy server |
Connecting in 3Sixty
-
Input the required information and hit "Authenticate".
-
For the Azure AD Connector, the tokens should automatically populate. Click Save.
-
-
You should see the "trust it" page again.
-
Click Trust It. You should return to your Auth Connection page, with all the appropriate fields populated.
-
Click Save.
Note: For SharePoint Online Tenants
Due to Microsoft's retirement of the SharePoint Add-In model (Azure ACS), newly created SharePoint Online tenants no longer support custom app authentication.
As a result, the REST Azure AD OAuth Connector is not supported in new tenants. Users should instead use the Microsoft Graph Connector.
For legacy tenants or on-premises SharePoint environments, the REST connector remains supported (with alternative authentication such as ADFS or NTLM, where applicable).
Discovery Connection
Discovery makes mapping to and from your sources easier for data migration and ensures the data gets connected to the right fields. Discovery requires an Authentication Connection
-
Select Schema Instance from the Navigation Menu or the Dashboard under Discovery
-
Select the new connection button
-
Enter a name for your Discovery Connection
-
Select your connection type from the drop down
-
Click save on the Create Connection form
-
In the edit connection page fill out any addition fields and click save
Guide to Discovery Connections
Instance configuration
-
Name: Unique Name for the Discovery Connection to identify it in the UI.
-
Authentication Connection: The Authentication connection to the SharePoint Server you want to discover
-
Ignore Types: Comma delimited list of types to ignore. Note that you can have regex as well. So to ignore all types with "workflow" in the name, you would enter(.)workflow(.) into the ignore types textbox.
-
Site path: Path to the Site you want to discover(i.e. /mysite/mysubsite). Enter a single forward slash / for root site (this will discover your entire site). Required to run discovery on tenant sites (ie, [sharepointURL]/sites/mysite)
-
NTLM: Leave blank. Include this on the URL in the authentication connection.
-
|
Field |
Description |
|---|---|
|
Name |
Unique Name for the Discovery Connection to identify it in the UI. |
|
Authentication Connection |
The Authentication connection to the SharePoint Server you want to discover |
|
Ignore Types |
Comma delimited list of types to ignore. Note that you can have regex as well. So to ignore all types with "workflow" in the name, you would enter(.)workflow(.) into the ignore types textbox. |
|
Site path |
|
Once configured click save and then on the Run link to execute the discovery. This could take quite a while depending on what site you decided to start at. For instance, a system with a thousand sites and 10 thousand libraries will take a while.
Integration Connection
Every job requires an integration connection for both the source repository connection and the output connection. Also known as input an output connections. Their job is to query or crawl remote systems for files, folders, metadata, versions, and renditions. In repo mode, it will retrieve list items and all of their relevant metadata from a list or library on the specified site. In output mode, the connection will write content and assign the mapped content type (from type mappings), or simply leave the new list item as a Document. Click here for more information on setting up an integration connection.
-
Select integration and click on the new connection button.
-
Enter the name and description of your connection.
-
Select the connection type from the drop down list.
-
Click Save on the Create Connection form.
-
Click Save on the Edit Connection page.
There are no fields to configure in an integration connection.
Guide to Integration connections
Note: FIELD MAPPINGS
A note on SharePoint REST Mappings. The only field type that needs the target type set for a mapping are Date fields. Numbers and text are parsed automatically from Strings.
Important: This connector doesn't support Manage Metadata Column Types
Job Configuration
A 3Sixty Job is the process of moving or syncing content (including versions, ACL's, metadata) from one CMS (content management system) to another. Add tasks to your job to have better control over how your data gets migrated. Click here for details on how to set up an integration job.
-
Select List Jobs under Jobs on the navigation menu or the dashboard
-
Click the create job button
-
In the New Job form
-
Name the job
-
Select Simple Migration from the job type drop down
-
Select the Repository Connection
-
Select the Output connection
-
Select your Content Service Connection
(Only required if you will be using Federation)
-
Click Save to open the Edit Job page
-
Fill in the configurations for the Repo and Output Configuration tabs
-
-
Click save to save your new integration job
-
Select Run and Monitor Jobs under Integration in the navigation menu
-
Click the play button next to the job you want to run
-
Click the refresh button to view your completed job status
(Larger jobs will take longer to run)
Repository
Configuration
|
Field |
Description |
|---|---|
|
List of Sites to Crawl |
Which sites to read from, in order. |
|
Libraries to Crawl |
The libraries crawl, in order. Libraries will be checked for name validity and access before crawling. Add default list "Documents" to crawl list for each site - All sites contain this list by default, if you wish to crawl it for all listed sites, check this box. |
|
Crawl all Libraries |
Search all libraries. Checking this option will ignore the libraries listed. |
|
Crawl subsites |
Search the subsites of your library list. |
|
Get Versions |
Will gather document versions and binaries (if include binaries is selected). This option will reduce processing speed of documents. |
|
Process Folders |
As the name suggests, will gather folder metadata for processing/output. |
|
Get Permissions |
Enables the gathering of security information from the site. If this option is selected, the selected level of security will be applied to each document. |
|
Non-Unique Permissions Inherit List/Library |
Checks to see if an item has non-unique permissions, if checkbox is checked it will inherit permissions from List/Library, if not checked it will inherit from parent. |
|
Parser Date Time Format |
The date/time format of where the SharePoint server exists. Use country codes such as AU or US, or date format such as MM/dd/yyyy hh:mm a |
Important: DATE/TIME SETTINGS
Check the settings for any existing jobs to be sure the date/time is set to US.
To confirm the location try running a test by running a SP to BFS job and check to see if the dates are accurate. Dates with day of month over 12 like July 25th would create an issue if converted from 07/25/2022 to 25/07/2022
Output
Important: SharePoint REST connector doesn't check for common illegal characters in file names before attempting to upload a file. The list of characters to avoid is % * : < > ? / |
|
Field |
Description |
|---|---|
|
Site Name |
The name of the sub site or tenant site where the data will be placed. |
|
List Title |
The name of the library where the data will be placed. |
|
Output Folder Path |
The output folder inside the Library. The folder will be created if it does not exist. |
Mapping
3Sixty Mapping gives you the ability to map your content types and metadata from one system to another.
There are two places in 3Sixty where you can set up mappings:
-
At the top of the mapping tab you can select from saved mappings
-
Creating a unique mapping based on your connectors.
Tasks
Job tasks also known as processors provide a processing pipeline for documents and metadata. Post processors can also be added as a task to run after the files are processed.
Click here for a list of all the tasks you can add to your integration job.
-
Click on the task tab in your integration job.
-
Find the task you want to create in the drop down. Tasks are grouped by type. You can also search for the task by name.
-
Select the create task button
-
Fill out the configuration fields. Some tasks do not require configuration.
-
Click Done to save the task to your job.
Content Service Connection
Connection Configuration
|
Field |
Description |
|---|---|
|
Site Name |
The site from which this connector is collecting data.
|
|
List Title |
The name of the library the connection will interact with. Connections can only support one library. The default value, if left blank, will be the Documents library, which will write to the Shared Documents' folder of your site. |
If you're going to be testing REST endpoints, you will need a REST client to make the DELETE and POST calls.
-
Refer to this tutorial to set up Postman.
-
cUrl calls will also work, but the Postman interface makes it all much easier.
If you want to map the document version comments, please add below mapping (mapping is shown from SharePoint REST to CMIS connector)
|
Source |
Mapping Type |
Target |
Target Type |
|---|---|---|---|
|
Document.CheckinComment |
Field Mapping |
cmis:checkincomment |
String |
For more information on the retirement, see Microsoft’s official announcement.
Related Articles
Managing SharePoint Permissions with Content Services
Retrieving SharePoint ID's Using Content Service
Load SharePoint Folders using 3Sixty’s CSV & SharePoint REST Connectors