Load SharePoint Folders using 3Sixty’s CSV & SharePoint REST Connectors
This document shows how a 3Sixty user can load files from a specific SharePoint Folder in a SharePoint Library into 3Sixty without having to crawl all the other files and folders residing in the same SharePoint Library. This solution uses the following technologies:
-
Built-in Microsoft Power Query Tool in Microsoft Excel for Windows
-
3Sixty CSV Connector for Repo and 3Sixty Filesystem Connector for Output
-
3Sixty SharePoint REST Authentication Connector
-
3Sixty SharePoint REST Content Service Connector
This guide assumes that the user understands how to create and configure basic SharePoint REST Authentication Connection and Filesystem Connection, and these steps will not be covered.
System Configuration
For this example, we have the following configuration:
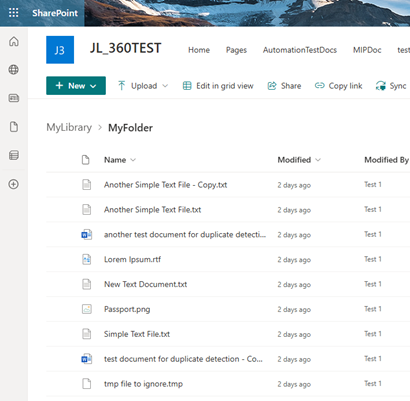
| SharePoint Artifact | Artifact Name |
|---|---|
|
SharePoint Site URL |
https://engcloud02.sharepoint.com/sites/JL_360TEST |
|
SharePoint Library |
MyLibrary |
|
SharePoint Folder |
MyFolder |
| 3Sixty Artifact | Artifact Name | Artifact Type/Description |
|---|---|---|
| 3Sixty Authentication Connection | SP Auth |
SharePoint REST Auth Connector |
| 3Sixty Integration Connection | CSV for SP |
CSV Connector |
| 3Sixty Integration Connection | Filesystem for SP |
Filesystem Connector |
| 3Sixty Content Service Connection | SPContentService |
SharePoint REST Content Service Connector |
| 3Sixty Simple Migration Job | CSV to FS |
Repo: CSV for SP Output: Filesystem for SP |
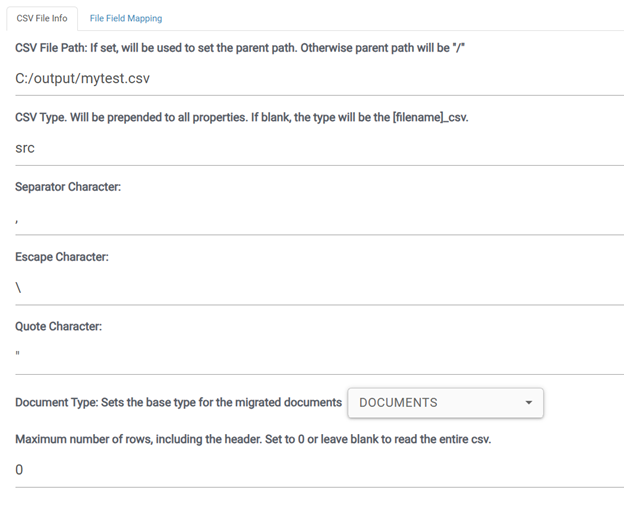
|
CSV File Path |
C:/output/MyTest.csv |
|
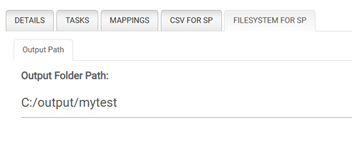
Output Folder Path |
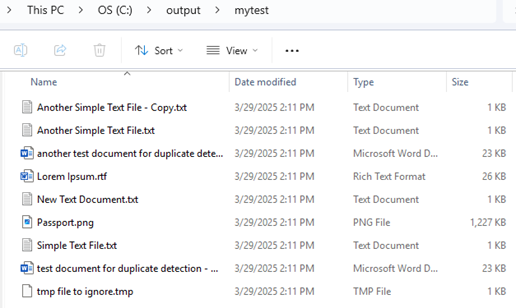
C:/output/mytest |
Prepare the CSV file
For this step, we need to leverage the built-in Power Query embedded in Microsoft Excel to build our CSV file. At the end of this process, we should end up with a CSV file that looks like the following:

-
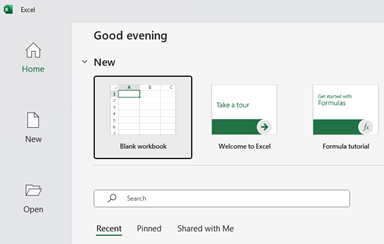
Start Microsoft Excel and create a New Blank workbook.
-
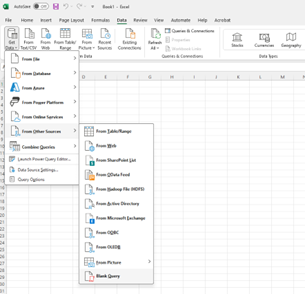
On the Data tab, select Get Data > From Other Sources > Blank Query
-
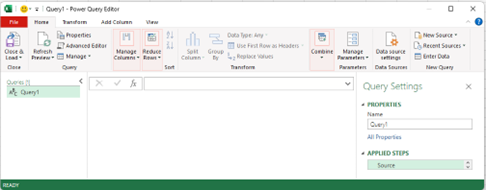
The Power Query Editor should launch in a new window.
-
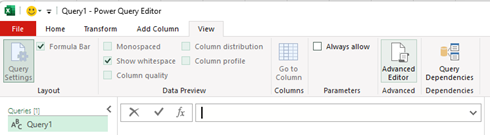
On the View Tab, select Advanced Editor.
-
Copy and paste the following query into the Advanced Editor.
// Connect to SharePoint sitelet// Using SharePoint.Contents API#"Source1" = SharePoint.Contents("https://engcloud02.sharepoint.com/sites/JL_360TEST"),// Navigate to the Library#"Library1" = #"Source1"{[Name="MyLibrary"]}[Content],// Get Files from the Folder#"Folder1" = #"Library1"{[Name="MyFolder"]}[Content],// Add ID Column#"Result1" = Table.AddColumn(#"Folder1", "ID", each [Attributes][Id]),// Using SharePoint.Tables API#"Source2" = SharePoint.Tables("https://engcloud02.sharepoint.com/sites/JL_360TEST", [ApiVersion = 15]),// Navigate to the Library#"Folder2" = #"Source2"{[Title="MyLibrary"]}[Items],// Add UniqueID Column#"Added UniqueID" = Table.AddColumn(#"Folder2", "UniqueID", each [File][UniqueId]),// Add Document Name Column#"Result2" = Table.AddColumn(#"Added UniqueID", "Name", each [File][Name]),// Merge Queries from Source1 and Source2, Left Outer Join on ID field#"Merged Queries" = Table.NestedJoin(#"Result1", {"ID"}, #"Result2", {"Id"}, "SP Table", JoinKind.LeftOuter),// Add UniqueID Column#"Expanded SP Table" = Table.ExpandTableColumn(#"Merged Queries", "SP Table", {"UniqueID"}, {"SP Table.UniqueID"}),// Remove Unused Columns#"Removed Unused Columns" = Table.RemoveColumns(#"Expanded SP Table",{"Content", "Extension", "Date accessed", "Date modified", "Date created", "Attributes", "ID"}),// Rename Columns#"Renamed Columns" = Table.RenameColumns(#"Removed Unused Columns",{{"SP Table.UniqueID", "id_object"}, {"Name", "name"}, {"Folder Path", "path"}})in#"Renamed Columns"Please note: When the document library name includes a space, like 'JL Test,' the space should be removed in the query. However, for the content service connection, the document library name should retain its original format, 'JL Test.'
-
Click on Done. This query will build the CSV file based on the specified SharePoint site, library and folder names (in bold).
Please note: SharePoint Library and Folder names are case sensitive.
-
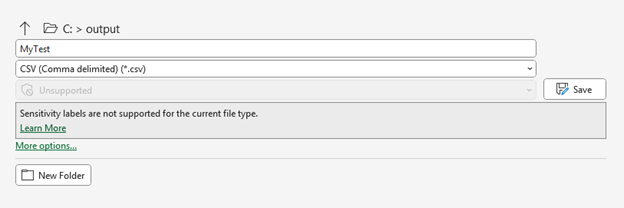
Click on the File tab and select Close & Load. This loads the data into the Excel Worksheet.

-
On the File tab, select Save As. Type in MyTest as the file name and select CSV (Comma delimited) (*.csv) as the file format. Save this file to the C:\output folder.
Create Connections
-
Create a SharePoint REST Authentication Connection. This connection will be used by the Content Service connection to authenticate with SharePoint.
-
Create a Filesystem Integration Connection. This connection will be used by the 3Sixty Job to output the files from the SharePoint folder to a file system.
-
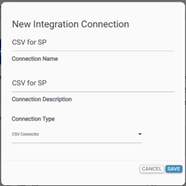
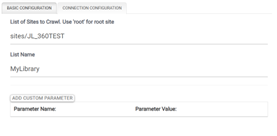
Create a CSV Integration Connection.
-
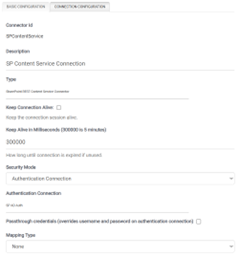
Create a Content Service Connection with the following configuration.
Create Job
-
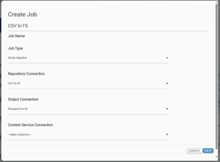
Create a 3Sixty Simple Migration Job.
-
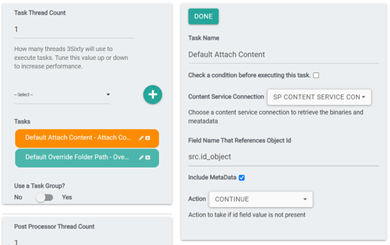
Create 2 tasks for this Job. The first task is Default Attach Content. Select the Content Service Connection you created before and specify the field name for the Object Id. Please note: The job configuration in step 4 will be prepending src. to the Field Name.
-
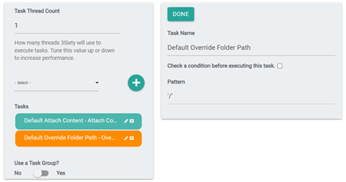
The second task to create is Default Override Folder Path. Use “/” as pattern.
-
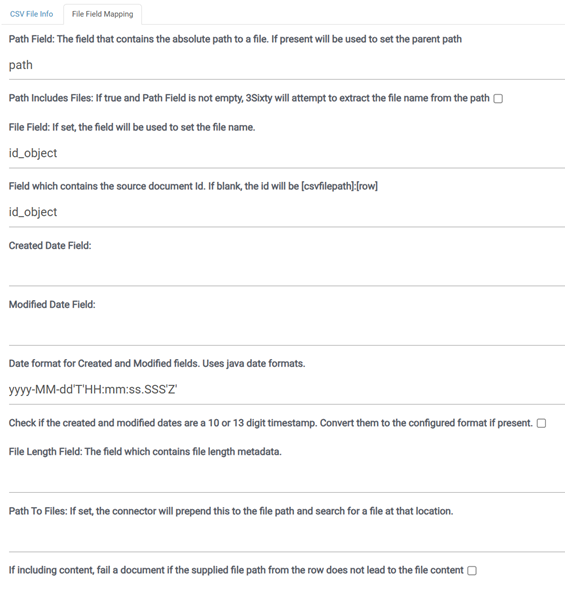
Configure the Repository Connection as follows:
-
Configure the Output Connection as follows:
Run the Job
-
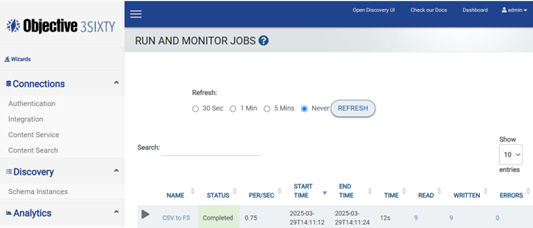
Run the 3Sixty Job.
-
Check the Output Connection folder.
Summary
If you need to load files directly from a SharePoint folder in 3Sixty, you could use the 3Sixty CSV and SharePoint REST Connectors as an alternative option.