Testing Content Services With Postman
3Sixty Content Service connections offer public REST endpoints that allow for integration with external applications.
Actions in the Content Services API or the Discovery web application perform actions against specific repositories through these connectors. This can be across ECM platforms like SharePoint, OpenText, or cloud systems like SalesForce, email or drives like Google Drive, OneDrive, or databases such as Oracle, MySQL, PostGRES, DB2, and SQL Server.
As a developer you can use our APIs to easily integrate multiple systems into your internal projects with one integration into 3Sixty. 3Sixty comes with several sample solutions such as eDiscovery, Records Management, Document Management, Secure Search, and an Outlook client integration.
Testing Content Services with Postman
In order to test content services, we recommend using Postman.
The first step in testing 3Sixty Content Services is to import the Postman 3Sixty Collection into your workspace/scratch pad.
Download the Postman 3Sixty Collection file and place it somewhere you can access the file. Open Postman and select **Import** and choose the JSON file you downloaded above. After the import is complete, you should see the **3Sixty** collection as shown below.

3Sixty collection expanded to show the main types of REST API calls.
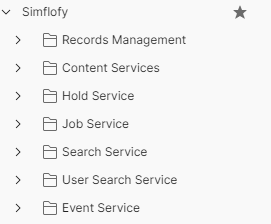
Working with the 3Sixty Postman Collection
The 3Sixty Postman Collection contains all the REST API calls that are currently available. We will focus on the Content Services API calls in this document. To work with this collection you will need to understand the variables that are defined. Click on the collection name and to the right, and you will see a tab called Variables.
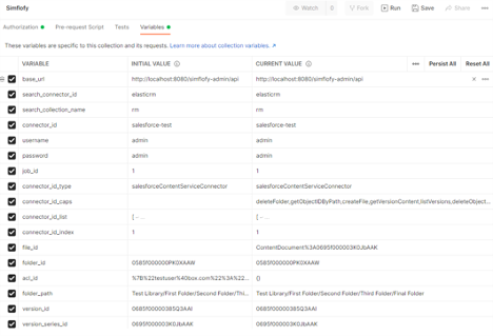
Variable Descriptions
| Variable Name | Description |
|---|---|
| base_url | URL to the 3Sixty admin API i.e. http://localhost:8080/3sixty-admin/api |
| search_connector_id | Used in the Search Service API calls. Not used in content services testing. |
| search_collection_name | Used in the Search Service API calls. Not used in content services testing. |
| connector_id | ID of the content services connector you created in 3Sixty. |
| username | 3Sixty user name |
| password | 3Sixty password |
| job_id | Used in the Job Service API calls. Not used in content services testing. |
| connector_id_type | current type of connector (e.g. filesystemContentServiceConnector) These names can be found by calling the capabilities endpoint. |
| connector_id_caps | A list of a connectors capabilities |
| connector_id_list | JSON array of connectors to test. Example JSON below the table |
| connector_id_index | The index of the connector in the json array of connectors |
| file_id | The id of a file/document |
| folder_id | The id of a folder |
| acl_id | Access Control List Id |
| folder_path | A folder path |
| version_id | A version id |
| version_series_id | A version series id |
| document_type | Type of document or content type |
JSON array of connectors to test example:
[
  {
    "connector_id": "salesforce-test",
    "connector_id_type": "salesforceContentServiceConnector",
    "folder_path": "Test Library/First Folder/Second Folder/Third Folder/Final Folder",
    "acl_id": "{}"
  }
]
Testing Content Services Step by Step
-
Create a Content Services connection in 3Sixty. 3Sixty Content Service connections offer public REST endpoints that allow for integration with external applications.
How to create a Content Service Connection. -
Initialise variables in Postman. The following variables are needed to get started with testing; Set these manually before running any tests: base_url, connector_id_list, document_type. (Set them in both the Initial Value and Current Value columns)
-
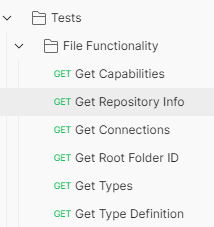
To test content services, we are going to use the predefined set of tests created under the folder Content Services\Tests\File Functionality. This folder contains a set of tests that you can run individually or as an automated set.
-
The first test you must run to initialize the variables is the Capabilities endpoint. This will return a list of all the capabilities for every content service connector.
-
On the left-hand side of the screen, single click the Get Capabilities API test. You will be presented with a screen showing the test details. As you can see from the screenshot, the Tests tab contains some scripting that will take the results of this API call and set certain variables in preparation for other calls in this folder.
-
To run the API, simply press the blue “Send” button and see the results in the Response window. You can continue to go down the list of API calls manually to test each call. Some notes about the order you run these tests. CreateFolder must be called before calling any methods that require a folder_id. CreateFile must be called before calling any methods that require a file_id. CreateVersion must be called before calling any methods that require a version_id.
If you do not want to call the API methods in order, you will need to manually set these id fields in the Variables tab.
-
Some API methods are not supported by a connector. For example, the JDBC connector does not currently support getting types. You will receive the following json if there is an error:
Copy{
"message": "Error while getting types for connection jdbc-sql-test Error: error.cscontroller.getTypes.name is Not Supported For This Connector. ",
"error": "error.cscontroller.getTypes.name is Not Supported For This Connector. ",
"success": "false"
} -
A successful API call will generally have the success flag set to true. Some API calls only return data. See the REST API documentation for more information. CreateFolder returns the following json if successful.
Copy{
"success": true,
"results": {
"id": "07H5f000000vcIlEAI"
}
}
Running a Set of Tests Automatically
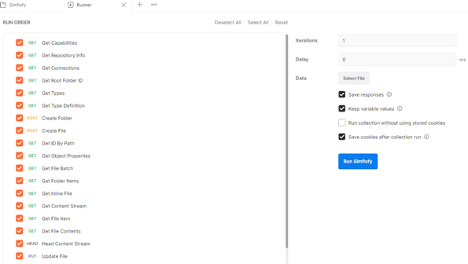
Postman has the capability to run a set of tests and report their success or failure. This functionality is called “Runner”. At the bottom right-hand corner of the Postman application is a small button called Runner. Click that button, and you are presented with a screen to drag and drop tests. Take the File Functionality folder and drop into Runner. Be sure to check the “Save Responses” option, so we can determine why a call may have failed.
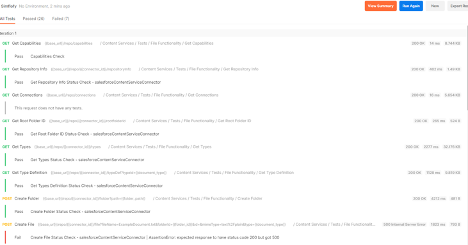
All the tests in that folder will be displayed with the option of selecting/deselecting each test. Click the blue Run 3Sixty button at the right to start running all of the tests in order. You will be able to see each test as it’s run and the result, pass/fail. After completion, you can view all successes and failures in the results window.
As shown below, 26 tests passed and 7 failed.
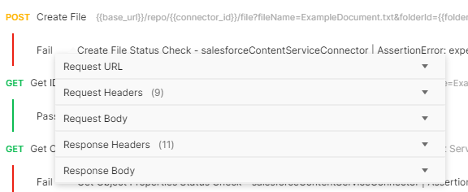
You can also click the name of the test in the results to see the request, headers and response.
